Easy Origami Paper Boat for Kids (Kagitha Kappal)
Fold the classic paper boat from one A4 sheet in 10 minutes. A simple rainy-day origami craft for kids in Chennai, Bangalore, Kochi and across South India.

What you need
- 1 rectangular sheet of paper (A4 printer paper or a notebook page)
- Crayons or sketch pens to decorate (optional)
- A little candle wax or crayon rubbed on the base, to keep it afloat longer (optional)
How to make it
 Dashed line: fold towards you
 Dash-dot line: fold behind
 Blue arrow: move the paper this way
 Turn the paper over
 Orange line: cut here
 Letters mark corners and points
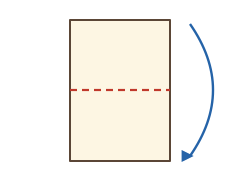
Place an A4 sheet upright (portrait) with corners A and B at the top and D and C at the bottom. Fold the top edge A–B down onto the bottom edge D–C, along the dashed line E–F.
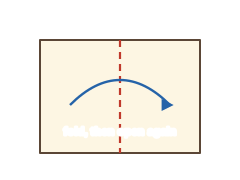
The fold E–F is now the top edge. Fold the paper in half from left to right to make a crease G–H down the middle, then open it again.
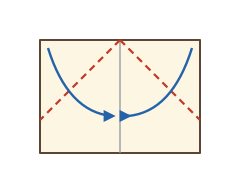
Fold corner E down along the dashed line G–I so the top edge lies on the crease G–H. Do the same with corner F along G–J. The two corners meet on the centre line.
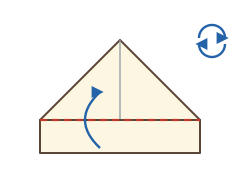
You now have a triangle with a strip below it. Fold the front strip up along the line I–J. Turn the paper over and fold the other strip up the same way.
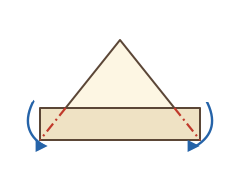
Corners K and L of the strip stick out past the triangle. Fold them behind along the dash-dot lines, on both sides. Now you have a paper cap.
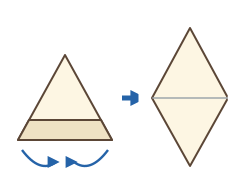
Put your thumbs into the bottom opening at P and pull the front and back apart. Corners M and N come together at the bottom. Press flat into a diamond with T at the top, P and Q at the sides.
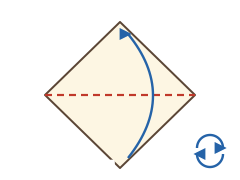
Fold the bottom point (M N) of the front layer up to the top point T, along the dashed line P–Q. Turn over and repeat. You get a triangle.
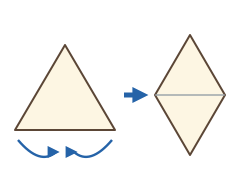
Open the triangle from the bottom again. Bring corners P and Q together at the bottom and press flat into a smaller diamond.
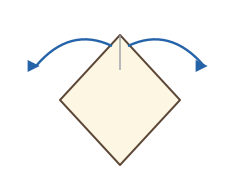
Hold the two loose flaps X and Y at the top of the diamond, one in each hand, and gently pull them apart sideways. The middle rises up into a sail.
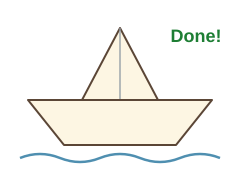
Press the bottom so the boat stands flat and sharpen the creases. Your kagitha kappal is ready to sail!
Tips for a boat that floats longer
- Thicker paper such as a calendar sheet or old magazine page lasts longer in water than thin notebook paper.
- Rub a wax crayon over the outside of the base. The wax keeps water out for a few extra minutes.
- Make the creases sharp by running a thumbnail along every fold.
A monsoon favourite in South India
Every child who has seen the monsoon in Chennai, Kerala or Bangalore knows this boat. It is the kagitha kappal in Tamil, kagadada doni in Kannada, kaagitham padava in Telugu and kadalaasu thoni in Malayalam. It is a great first origami for pre-KG and primary school children: there is no cutting or glue, and it teaches halves, triangles and squares while they play.
Want a boat that will not get wet? Have a look at our handmade coconut shell sailboats below.